AMK 1/48 MiG-31BM Foxhound Kit Build Review
By Michael Benolkin
| Date of Review | January 2016 | Manufacturer | AvantGarde Model Kits (AMK) |
|---|---|---|---|
| Subject | MiG-31BM Foxhound | Scale | 1/48 |
| Kit Number | 88003 | Primary Media | Styrene, Photo-Etch |
| Pros | Stunning details | Cons | See text |
| Skill Level | Experienced | MSRP (USD) | $54.99 (at Sincere Hobbies) |
Build Review
For a brief history of the MiG-31 and a look at this kit out of the box, look here.
This is my first AvantGarde Model Kits (AMK) kit and so far, I am quite impressed. The kit is beautifully detailed, but having seen very detailed kits in the past, I was concerned. Some of those past kits also looked good out of the box, but when you put the parts together according to the instructions, you can’t close the wings or fuselage halves. In any case, let’s get started. This kit provides options for the MiG-31BM and MiG-31BSM variants. These are MiG-31B and MiG-31BS airframes that were updated (hence the M (modified) suffix) and the most visible difference between the MiG-31B/BM and MiG-31BS/BSM is that the B/BM is equipped with a retractable air refueling probe while the BS/BSM cannot air refuel. I'll be doing the BM in this build and if you're interested in the earlier MiG-31B/BS variants, AMK will be releasing that kit in the near future.
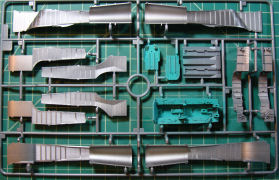
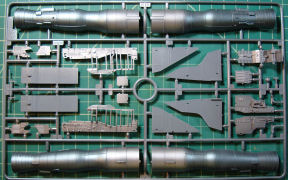
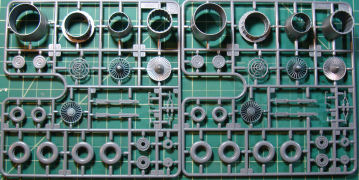
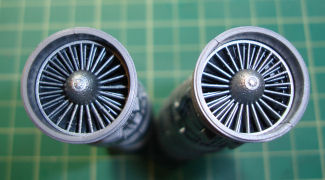
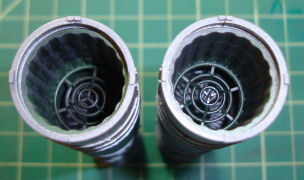
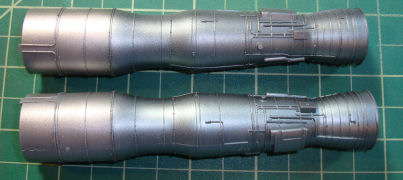
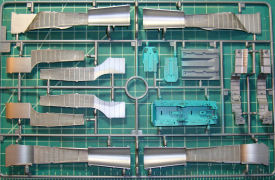
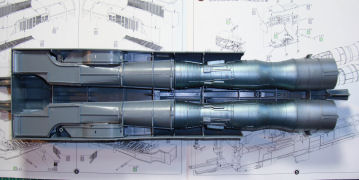
The running joke among aircraft modelers is that a good kit starts in the cockpit. This kit starts with the intakes, then the engines, and then the lower fuselage. I decided to pre-paint many of the parts while they were still on the parts trees. Take a close look at those intake ducts in the first image, the details molded into those parts are nice! In this build, I'm also trying out the acrylic-based metal colors from Mig (appropriate, eh?) and the MiG-31 cockpit and airframe colors from Akan. I cleaned the parts trees with Isopropyl Alcohol, then applied the Mig Polished Aluminum acrylic to the intake ducts and wheel wells, and Akan cockpit color to the cockpit tub and bulkheads. The compressor section of the engine was painted Mig Titanium acrylic and the turbine face and afterburner petals received Mig Steel acrylic.
If you've looked up the tailpipe(s) of MiGs, you've seen that same green used on wheel hubs and other details around the airframe. Seeing green in the afterburner is interesting given the temperatures inside the chamber, but aside from the scorched kerosene soot also in the chamber, that green is still present. I used the Akan green for the afterburner chambers as well as the landing gear wheel hubs. The afterburner chamber was dry-brushed with Gunship Gray and then sprayed with AK Interactive Jet Exhaust to add the heat-wear look.
I really had to resist adding any more paint to these engines. The detail is great, but you won't see anything of them other than the compressor faces down the intakes and the afterburners from behind.
Looking at that great texture inside the intake and wheel well walls, you know would not be be clean silver given that we'll be weathering the outside of the airframe. I applied some dirty panel line wash to those areas to add some depth to the details. After leaving the parts to dry/cure for six hours, the paint was fairly robust to handling but the enamel wash had damaged the acrylic silver in places. As I assembled the parts, the acrylic metal also tends to craze when exposed to cement, but if you leave the parts alone, the crazing disappears with no texture left behind. The few spots that had bare plastic exposed were quickly touched up. Note that the Mig acrylic metal colors are the only ones I've found so far that work as well with a paint brush as with my Iwata HP-CS airbrush.
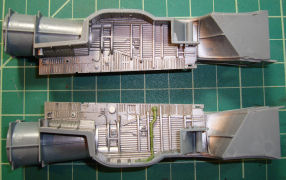
Here are the intake ducts and main wheel wells assembled. I can't recall the last time a model fit together so precisely that parts literally snapped into place. Here is a good example of where you need to be careful. The main wheel well parts that overlay each intake trunk literally snap into place, but in one case, one of them dried slightly out of place when I set it aside to dry. The result was a very poor fit inside the lower fuselage half. I simply used liquid cement to loosen, then reset the wheel well and all fits nicely. The precision of this tooling doesn't allow for even minor imperfections in parts clean-up or assembly.
For what it is worth, the MiG-31 airframe gray (PVO gray) is available from Akan as #73059 and when we tested that color against our color matching system, we found Gunze H307 is somewhat close while Tamiya AS18 or XF83 are closer, as are ModelMaster 2035 and Vallejo 71.050 or 71.051.
To be continued...
My sincere thanks to AMK for this review sample!


