Airfix 1/72 Swift FR.5 Build Review
By Michael J. Gething
| Date of Review | October 2016 | Manufacturer | Airfix |
|---|---|---|---|
| Subject | Swift FR.5 | Scale | 1/72 |
| Kit Number | A04003 | Primary Media | Styrene |
| Pros | Excellent detail | Cons | Build with care - not to be rushed |
| Skill Level | Experienced | MSRP (BP) | £14.99 |
Build Review
I will assume that readers of this build review will have already read the First Look (out-of-the-box) of the Airfix Supermarine Swift FR.5
(Fighter, Reconnaissance Mk 5), which served with two units of the Royal Air Force (RAF) – 2 Squadron and 79 Squadron – from February 1956 until March 1961.
This kit builds into an excellent model of the original but it is not without its challenges. As noted in the First Look, there is a wealth of detail in this kit that must be prepared before the model looks like a real aircraft. Some parts, notably the main undercarriage support struts (A08 and A09) and doors (C01 and C02), are very delicate moulds (reflecting the correct dimensions in scale), so should be removed from the sprue with great care.
I followed the instruction build stages with Stages 1 to 4 covering the cockpit area. Paint numbers supplied are from the Humbrol enamel range: no.85 is Coal Black (giving a finish that is halfway between gloss and matt, but not satin), no.96 is RAF Blue and no.103 is Matt Cream.
The Martin Baker Mk.2 ejection seat comprises two halves (B08 and B09) plus the seat cushion with an option of engraved straps (D06) or plain (D07). Note that the seat’s blue webbing straps are to secure the pilot to the seat and the buff webbing is for the parachute, already attached to the seat. I used a little Squadron White Putty to fill the gap in the centre of the headrest and to create the drogue chute packing on the very top of the seat, which was painted in coal black with gunmetal (or silver) dry brushing to highlight details. I later crafted the headrest initiation handle (painted black and yellow stripes) from rose wire and attached to the front of the seat top.
The three-part cockpit area was painted coal black on the sprue with silver dry brushing, along with the instrument panel (C-15) with the reflector sight (F07) attached. Once dry, the parts were detached from the sprue. The cockpit instrumentation for the sides and main instrument panel were applied at this stage with the aid of Mr Mark Setter and Mr Mark Softer. The ejection seat was then cemented to the one-piece rear bulkhead-floor (D11), followed by the sides (B05 and B06), control column (A03) and instrument panel/sight assembly.
The two-part nosewheel bay (B02 and B03) interior was also painted silver and the details highlighted in coal black on the sprue, before being detached and cemented together (Stage 5). Note that the two protrusions on the rear face represent the rudder pedals and all should be painted coal black, along with the outsides of the bay (otherwise the camera windows will show a grey plastic area, when all assembled. Once done, the nosewheel bay can be cemented to the cockpit area (Stage 6).
Next up was the jet pipe in three parts (C12, C13 and D04) which were painted gunmetal on the sprue. Once dry they were detached and assembled (Stage 7).
Stages 8-11 cover the assembly of the intake splitter plates and their attachment to the fuselage halves: the outside of parts D12 and D13 being indicated to be painted matt white. Stages 12 and 13 cover the side and nose camera windows, either in transparency form (E01, E02 and E05) or as solids (A05, B10 and B11). I used the transparency option. I now jumped to Stage 16 for the air intake interior and front end of the Avon turbojet engine, which was painted in gunmetal. Stages 14 and 15 see the cockpit and engine jet pipe added to the port fuselage half.
Stage 17 brings the two fuselage halves together, once noseweight had been added (to prevent tail-sitting). Airfix recommends 2gm of weight – I used more, stuffing ‘empty areas’ (including behind the intake splitter plates) with lead shot (I still have a dwindling supply of this non-environmentally-friendly but very useful commodity) secured with white glue. I slightly overdid it, as when I closed the two fuselage halves the joint was not clean and required some later filling. Stage 18 located the engine intake into the fuselage through the open area where the wing is attached.
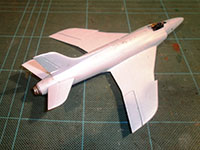
Stage 19 sees the upper wing surfaces attached to the one-piece wing underside, and Stage 20 mates the wing to the fuselage. It also had the fuselage belly fuel tank added. I omitted this element as I was awaiting the Freightdog resin replacement part (added much later after the main paint job had been completed). The tailplanes and rudder were added in Stage 21. The dihedral angle of the tailplanes is 80 deg from the vertical and I measured out and cut an angle guide out plastic card to assist me.
Stages 22 and 23 deal with the under wing flaps – they can be fitted flush or drooped. As I chose the latter option, I left these to be fitted later. The ailerons were attached, as per Stages 24 and 25. Stage 26 offers the option of attaching closed undercarriage doors or starting the assembly of the landing gear. As I prefer to attach the undercarriage (Stages 26 through 32), canopy (Stages 34 through 36) and pitot tube (Stage 33), along with the wing flaps, after painting and decaling, I got out my pint pots and checked out the excellent colour four-view illustrations supplied as to the camouflage pattern.
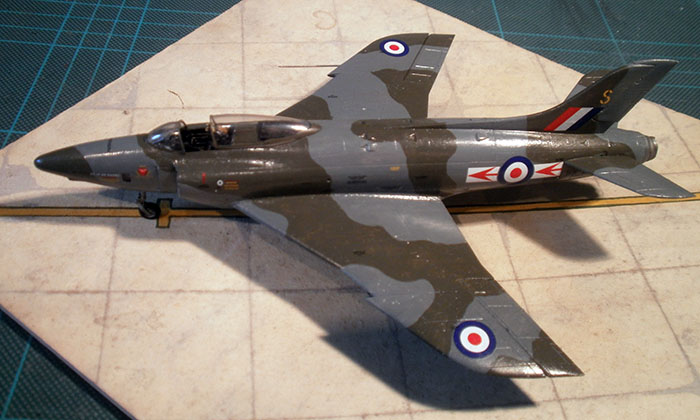
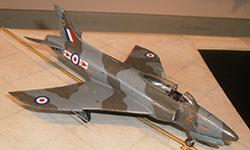
I went over the basic model, did a little minor filling (that fuselage joint) and finishing (including covering the nose camera windows with Humbrol Maskol, and began the careful process of brush painting, beginning with the upper surfaces, including the wrap-around over the leading edges of the wings and tailplanes. I applied the Dark Sea Grey (Humbrol 164 – BS638) first, and waited overnight before applying the Dark Green (Humbrol 163 – BS641). I also painted the flap interior in Interior Green (Humbrol 78), with a black wash to tone it down. Once fully dried (overnight), I masked off the demarcation lines of the upper surfaces, including the wrap-around to the undersides, and applied the PRU Blue (Humbrol 230).
After another overnight wait, I removed the masking and did a little touching-up here and there and applied a coat of Klear and began the long process of decal application. [Thinks: Some 50 years ago, when I were a lad, and decals were called ‘transfers’, they just comprised the national insignia, serial number and squadron codes/markings, I soaked the whole sheet in one go and had them applied inside 30 minutes. Tempus fugit!] Today’s decals are of higher quality and thinner and encompass the myriad of stencilled warnings that appear on the real aircraft. A separate illustration identifies the locations for them – essential for correct placement. I applied them in small batches, allowing them to fully dry and set (with the aid of Mr Mark Setter and Softener solutions). I was particularly impressed with the way the underwing serials were cut, to allow those parts of it that were on the undercarriage doors to be applied separately. I did encounter a small setback when one of the tailplanes snapped off (clumsy boy!) but it was refitted after decal completion. It took me a week in short bursts – a final coat of Klear had the model looking ‘rather cool’ (as The Young Master would say).
I was now ready to assemble the undercarriage and paint it (applying the aforementioned door decals as well) and then fix them to the model, along with the pre-painted flaps (drooped), replacement belly tank, canopy (in ‘open’ position – no pilot figure was supplied for the Swift – a ‘first’ for Airfix) and the pitot tube. Here the delicacy of the moulding defeated me and it broke! Determined to be undefeated, I used the old stand-by of a metal pin cut to suitable length. Although not exactly the correct shape, it serves the purpose well enough.
The end result was, to my mind, a splendid model – one of the four kits presented to me on my retirement from IHS Jane’s last November. I know it is not a competition winner but I enjoyed the construction and painting process – which is what the hobby is all about.


