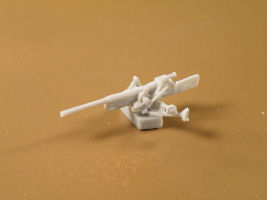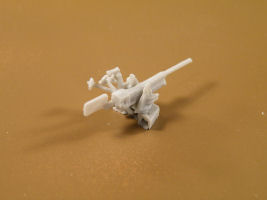
Ace 1/72 3.7cm PaK 35/36 auf Sd.Kfz 10 Build Review
By John Kelley
| Date of Review | April 2011 | Manufacturer | Ace |
|---|---|---|---|
| Subject | 3.7cm PaK 35/36 auf Sd.Kfz 10 | Scale | 1/72 |
| Kit Number | 72281 | Primary Media | Styrene |
| Pros | Good detail; numerous parts; different versions can be made | Cons | Instructions vague in some areas which required reference sources |
| Skill Level | Experienced | MSRP (USD) | $14.90 |
Background
I found very little history on this particular kit, however, the real Sd.Kfz10 was produced in large numbers, approximately 25,000. They were produced by nine companies, the most familiar being Demag. This half track entered service in 1937 and remained in production until 1944. Seven thousand five hundred chassis were diverted for use in the Sd.Kfz 250 series half-tracks. I have found photographs of the 3.7cm anti-tank gun attached but not with the extra armor. Still, I thought it was a unique model and this is the one we will be reviewing. The kit offers the armored and unarmored version of this vehicle and three decal selections.
The Kit
The Ace kit is probably the most comprehensive model I've built yet. With seven sprues, two photo-etch sheets and two vinyl tracks, this is more parts than I've encountered in any other 1/72nd kit. Most have an average of two to three sprues. This is an excellent kit but is not one that you will build in a couple of days. As with all short run production kits, patience is required to produce a good model. As you read this, you will find that I made some mistakes and I will pass on to you what I found to be the easiest solution.
Assembly
Starting with sequence A, I found a large mold seam on the sides of Part 16. This needs to be removed since it can be seen after the kit is assembled. I had no trouble assembling the interior, but the floor Part 7 needed beveling at the back where it meets the rear of the hull so that the floor would sit flat in the chassis.
I added .020 plastic to the back of the instrument panel to reduce a gap between it and the hood. I left off Parts 17/15, which are for the running gear, until the last. I then proceeded to Step B, assembly of the gun, and this proved not to be difficult at all. However, the parts are delicate so after assembling you will definitely want to set this aside until the end of your construction. Next, I returned to the lower chassis and added the seat benches/stowage boxes. I filed off the flash and assembled the parts with no problem.
When I test fitted Part 34, the rear fenders, the right side did not sit level. I filed down the top of Part 16 until Part 34 set level. I also added some .010 x .040 strip styrene between Part 34 and 16 due to a gap which was visible. The fender stowage box and exhaust covers Parts 10 and 11 required filing the edges down so they would sit between the fenders and the guards on Part 16.
I then began work on the troop compartment. One of the items to assemble is a box for the 3.7cm cannon to sit on. This box was not well molded and required shimming to get the sides level and parallel to the top Part 60.
If I were to build this kit again I would probably replace the box with a scratch built one or square tubing. After I added the box, I attached Parts 30, the side pieces, to the hull. On Part 34 there are indentations where the rest of the plates are to be attached. I found by trial and error that the side plates Parts 23 were too long. I glued Part 24, the rear plate, in first then Parts 26 and 29 and then cut Parts 23 to fit.
The next item to work on was the hood. Ace gives you two photo etched louvers for each side. These have a lot of brass around the louvered area which when I attached it just didn't look right. I removed the part and trimmed all the excess brass off leaving only the louvers and added them to the hood.
At this point, the latches should be attached but to be honest I forgot them. However, with all the additional armored plating, they're barely seen anyway. One area that gave me trouble was adding the front tow hooks Part 46. These should fit in a slot in the fenders and attach to the side of the radiator and hull. I had a great deal of difficulty adding these and wound up cutting off the excess portion of the hook and gluing it to directly to the sides of the radiator. I would recommend filing out the area between the radiator and the fenders so that the hooks can slide in easily.
This is where good reference sources are necessary and the one I use the most was www.primeportal.net for most of the questions I had in building this kit. The example I used was a restored Sd.Kfz10 and it was useful for those areas of the instructions that were quite vague. After having put this kit together, I would recommend installing the headlights, tools and Notek light before adding the armored plate for the front. I then installed the rear tarp and the hoops that are glued to the side of Part 32. I glued these at an angle so that the longest rod was half way between the top and bottom of the side plate.
I assembled the front wheel suspension system without any problems. The armor plating for the front end was difficult to add as there is not really a good surface to glue on. Since I didn't have pictures of the real thing, I cheated and attached the armor plating to the headlights. Since these lights are covered up and have slits in them, I figured this would be a rational solution. I then added the braces and began assembly on the running gear. Ace made the running gear separate and this will ease construction in this area a great deal.
Since the lower chassis is at an angle I would use double stick tape to attach the side pieces, parts17/15 and then add the road wheels making sure they are vertical. Once they are dry they can be gently removed and the rest of the running gear and tracks installed. Everything went together well, but I was not happy with the tracks.
The drive sprocket and wheels have no centers to them so the tracks stick out away from the wheel, as you can see on my kit. For this, I would file a groove in the drive sprocket and for the rear wheels, I would simply remove the teeth. To attach the tracks to the wheels, I used Loctite All Plastics Adhesive. This is a super glue and primer that allows you to bond different plastics together. It works very well and very quickly.
I then added the main gun and shield and the fuel cans. I should have left the fuel cans until the last because they interfered with the cab armor. The width indicators were made using brass wire and the ball on the end was made using numerous coats of super glue. The rearview mirrors were then added using brass wire as a post and the mirrors super glued onto this. After this model was complete and I began painting.
Painting and Finishing
I started by pre painting the interior and the road wheels. For the base coat I used Tamiya German Gray XF-63 and lightened it 30% with Flat White XF-2. For the cab seats I painted them black and picked out the instrumental panel in black and white, and painted the steering wheel black.
After assembly, I completed the spraying with the same German Gray mixture and I painted the tires and road wheel rims NATO Black XF-69. The tools were painted Model Master Wood and Tamiya Gun Metal X-10. I then clear coated the model with Pledge Floor Wax with Future and used a black oil paint wash for the details and then dry brushed with the same German Gray mixture.
The decals where then added to the model, and these went on with no problem except the kill rings on the gun barrel. I found these to be too short around the barrel where the instructions have you place them and a little stiff, but they finally conformed with a generous application of Micro Sol. If the kill rings are moved further down the barrel I am sure they will be long enough. I would leave off the gun until the decals are applied for this version.
The instructions did not call for a rear license plate so I left that decal off. The decals were then coated again with the Future and the model was flat coated with Tamiya Flat Spray in the rattle can. The machine gun was painted Gun Metal with a red brown stock and the wheels were the last items to be added to the model.
Conclusions
While this kit is not for the beginner, it is definitely one you should purchase. I have built Ace kits before and, fit wise, this was one of their best. The level of detail was very good and I cannot recommend this kit highly enough to any one interested in WWII German soft skins. Using patience, files and a little forethought, this model can be made into an excellent example of the real thing.
My thanks to HobbyTerra for this review sample.


