Academy 1/35 M1A2 Abrams SEP v2 TUSK II Build Review
By Michael Benolkin
| Date of Review | December 2017 | Manufacturer | Academy |
|---|---|---|---|
| Subject | M1A2 Abrams SEP v2 TUSK II | Scale | 1/35 |
| Kit Number | 13504 | Primary Media | Styrene, Photo-Etch |
| Pros | Nice detailing and options | Cons | See text |
| Skill Level | Experienced | MSRP (USD) | $69.00 |
Build Review
For a look at this kit out of the box, look here.
I've been wanting to build a modern M1A2 Abrams for a while, especially after some work-related support of same. While there have been numerous M1A2 kits 'out there' for some time, none of them represented the modernized versions in the field until a year or so ago. With all of the hype surrounding the Meng kit, that sounded like just what I had been waiting for. Unfortunately, it wasn't long before the errors of the Meng kit were being revealed online, and so it was with several other releases. When Academy released their M1A2 SEP v2/TUSK 1/TUSK 2 kit last year, I was surprised by the number of folks that dismissed the kit, but after the release of the other M1A2 SEP v2 kits, the Academy kit was actually ranking near the top of its class.
It was time to start working on my Abrams backlog. Having also just received the Panda-Hobby 1/35 M1 Abrams kit, I grabbed my Academy kit and decided to build them side-by-side. Shortly after starting the project, the new Academy M1A2 SEP v2 TUSK II kit arrived and I've shifted the Academy build to this new version. The main difference between this kit and the previous release is the addition of individual track links and the additional turret mounts for the TUSK 2 armor.
Getting started with Step 1, we assemble the lower hull. The kit uses two bulkheads to align and reinforce the side panels, but to make them all fit, I took the time to clean off any sprue tree stubs and mold flash using the Sujiborido file. The mating surfaces are clean and ready for glue.
Step 2 and Step 5 focus on the road wheel assembly and suspension arms. Once again I address the mold lines and sprue tree stubs using the Alec F-V6 on the wheels and the Alec R-Boko on the suspension arms. These tools don't have knife edges, rather they are square-cut aluminum edges that cleanly scrape away the mold lines and flash without gouging the plastic surface (unless you push a corner of the tool into the plastic surface - no bueno). These tools made quick work of the parts clean-up.
Here's a look at the assembled hulls for the Academy kit (left) and the Panda-Hobby kit (right). The Panda kit's road wheels don't have their wheel rims installed yet.
Here's another look at the Academy lower hull which is now ready for priming. With the wheels and drive sprockets installed, that closes out Steps 2-7.
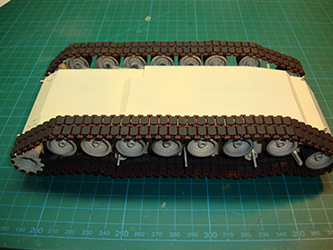
Here's the Academy kit primed in desert sand on the right, and the Panda-Hobby kit primed in NATO green on the left. The Academy kit has also received the boat hull counter IED armor per Step 8.
The next step is to assemble the individual track links unique to this release of the Academy kit. Before we do, I wanted to try a few other things first.
When this kit was given its first-look write-up, I heard from one modeler who was happy to hear about the new track option because the kits rubber (vinyl) tracks didn't fit, nor did they assemble well. I'm not certain what kit they had been working on but it wasn't this or the previous M1A2 SEP v2 from Academy. Below are the rubber tracks and they use two styrene link halves to connect the ends. The fit of the assembly and the fit of the track on the tank are both excellent. These T158 rubber tracks are the easiest to assemble because using the styrene connector link, they go together using normal liquid cement.
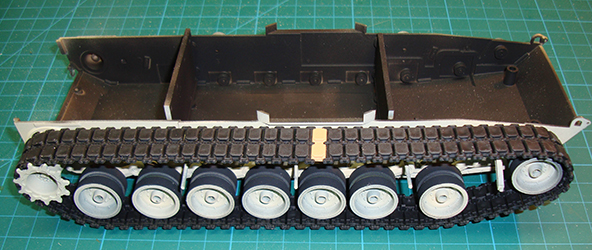
Here's a look at the Academy hull with the Panda-Hobby T156 track link assembly. This too went on with no issues and looks fine (other than being the wrong track for this version). Since the Academy individual links assemble similar to the Panda-Hobby individual links, I'm ready to tackle them next.
There are two distinct differences between the Panda Hobby M1 T156 tracks above and the Academy M1A2 T158 tracks below. First, the Panda track links are molded from the same 'hard' styrene as the rest of the kit while the Academy track links are molded from a softer styrene than the rest of the kit. Second, the track pads are molded onto both sides of the track links in the Panda kit while the pads are only on one side of the Academy track links. Otherwise, both sets of track are connected by 'snap-on' centerline guide teeth and then each side of the track links are capped by link connectors. While I was lamenting on how long it took to assemble the Panda track links, someone pointed out that the links go together rather quickly. While this is true, it doesn't take into account the time it takes to remove the remnant sprue stubs on each and every track link, guide tooth, and connector.
Once I cleaned up the track parts in the Academy kit, I clipped 10-12 links together and slid them onto the connectors while they remained on the sprue trees. Once I got the hang of aligning and pressing the link pins into place, the assemblies went together rather quickly. The photo on the right shows that the protective sprue stub at the end of the connector run does get in the way of the tracks and I clipped them out of the way.
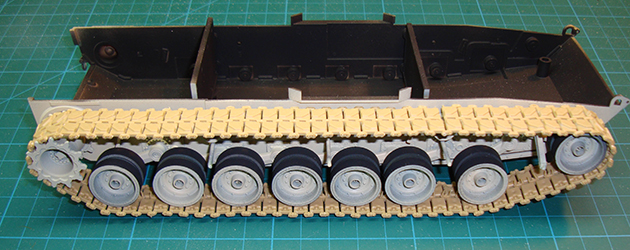
With the two runs of track assembled, I did a test fit on the Academy hull. The images below show the tracks before the separately molded track pads were installed. Note that I was a bit concerned that the 'softer' styrene would turn out to be vinyl, but the track and track pads respond like normal styrene to Tamiya Extra Thin Cement.
Here's one disappointment in the Academy track links. While they assemble nicely, the fit on the M1A2 hull is not right. In these photos, I have one extra track link in each run which results in track sag. If I remove the extra link, the fit is so tight that it sheared a few track pins. This is where an adjustable front roller would be ideal, so you can tension your tracks without any fuss. While the result is a bit messy, nobody is going to see this when the upper hull and side skirts are installed.
The tracks were removed and given their primer and initial colors before being permanently mounted to the hull.
I painted the track runs with a rust base color before applying the rubber painted track pads. With both runs completed, I tried again to install the runs with one track link removed and once again, the wasn't enough slack in the system to connect the tracks without shearing a track pin or axle. With the exta link reinstalled, The runs still have sag in them but as I said before, this won't be visible later. It is finally time to flip the lower hull over and start on the upper hull half.
To be continued...


