Academy 1/35 Magach 6B Gal Batash Build Review
By Dave Manter
| Date of Review | December 2013 | Manufacturer | Academy |
|---|---|---|---|
| Subject | Magach 6B Gal Batash | Scale | 1/35 |
| Kit Number | 13281 | Primary Media | Styrene |
| Pros | New tooling on all parts for this version | Cons | No anti-slip texture |
| Skill Level | Experienced | MSRP (USD) | $59.00 |
Build Review
If you'd like to take a look at the kit as it comes out of the box, check out the in-box review
previously published here on Cybermodeler Online.
The Academy Israeli Magach 6B Gal Batash kit is a mix of old parts and new. Some of the dates on the sprues go back as far as 1990. The new parts that make this version unique are all 100% new tooling. The parts are all well molded and the new parts are great. There is some flash and heavier seam lines on the older parts that will require some more extensive cleanup.
Construction
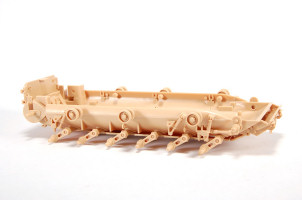
Steps 1 thru 3 have you assemble the lower hull and most of the suspension components. These are all from previous Academy versions of the M60 series and the hull does still have the motorization holes in it. The long seam line that runs the length of the lower hull that occurs from assembling parts B1 and B2 to the lower hull tub is significant. However, this seam line will not be to visible due to the side skirts.
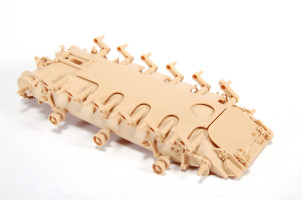
Step 4 has you finishing up the road wheels and applying the newly tooled belly armor. Fit of all of the new parts is near perfect!
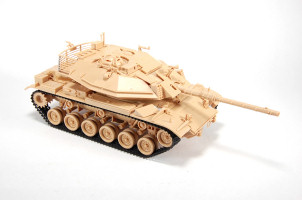
Steps 5 thru 7 have you adding the details to the upper hull. The standard fittings for the M60 series are all older tooling but the fit and detail is very nice here. There are faint guidelines in the fenders for the location of the new parts. I did skip ahead here and glued the upper and lower hulls together to make the fitting of the extra nose armor easier to fit. I did have to chisel the step ledge off of the front lower armor (part M35) to allow the nose armor (part M37) to fit better.
Step 8 has you assemble the side skirts. These are all newly tooled and the fit is great.
Steps 9 thru 11 have you assemble the turret. All of the parts here are newly tooled, except for a few small fittings, and the fit is great. The large parts for the angled side armor have some of the best fit that I have encountered in some time. Well done! You do get a choice in the front armor for the mantlet, either plain or with the M2 machine gun mount. The large turret basket is very well done and pretty easy to assemble.
Painting and Finishing
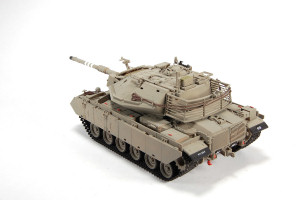
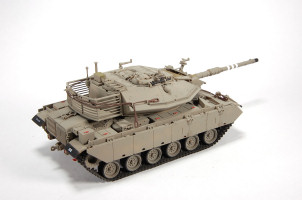
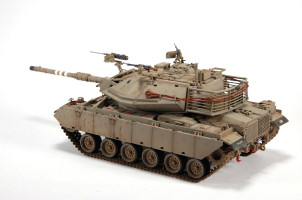
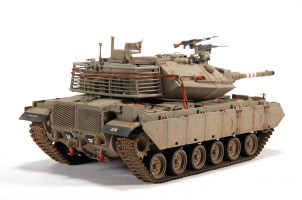
Painting began with a custom mix of Tamiya paint for "Israeli Grey". I used Tamiya XF-20 Medium Grey, XF-49 Khaki and XF-24 Dark Grey in a 10/5/2 ratio. This was then thinned 50% with Tamiya X-20A thinner. This color was applied in two light coats to the entire vehicle. I then painted all of the details.
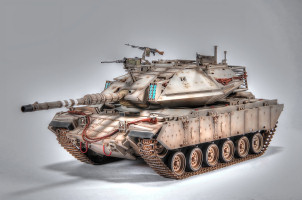
Once the base colors had been applied and were dry, I mixed up my base color along with 20% of my scale black color (XF-1 Black and XF-64 Red Brown, mixed 50/50) and post shaded the entire tank. I wanted to accent the additional armor and this worked very well. Next up was a nice dirt coat using XF-72 Brown. This was sprayed all along the bottom of the side skirts and under the lower front and rear of the tank. I also sprayed a very thin layer of this color over the top surfaces of the hull and turret.
With the airbrush work now completed, I mixed up a pin wash using Van Dyke Brown and Lamp Black oil paint and applied this along all of the raised and recessed details.
The tracks were highlighted with silver on the raised surfaces using a silver artist pencil. I then mixed up a couple of shades of pigments and applied this to the tracks.
Conclusion
This is a pretty nice kit of a very unique looking MBT. While the older parts are starting to show their age, all of the new parts are really well detailed and the fit is nice. Construction is straight forward and easy to follow. I had to use just a little filler in a couple of places.
Thanks to MRC for this review sample.


